12 Hoop House Chicken Run Ideas (Cattle Panel Builds)
The cattle panel hoop run is the strongest cheap structure in chicken keeping: arch a 16-foot livestock panel between two ground rails, cover it in mesh, and you have a run that shrugs off snow, wind and the occasional falling branch — for less than most framed builds. These 12 hoop run ideas cover the classic two-panel build, bigger and smaller versions, mobile bases, winter conversions and a greenhouse conversion, each with a spec card and an honest 2026 cost estimate.
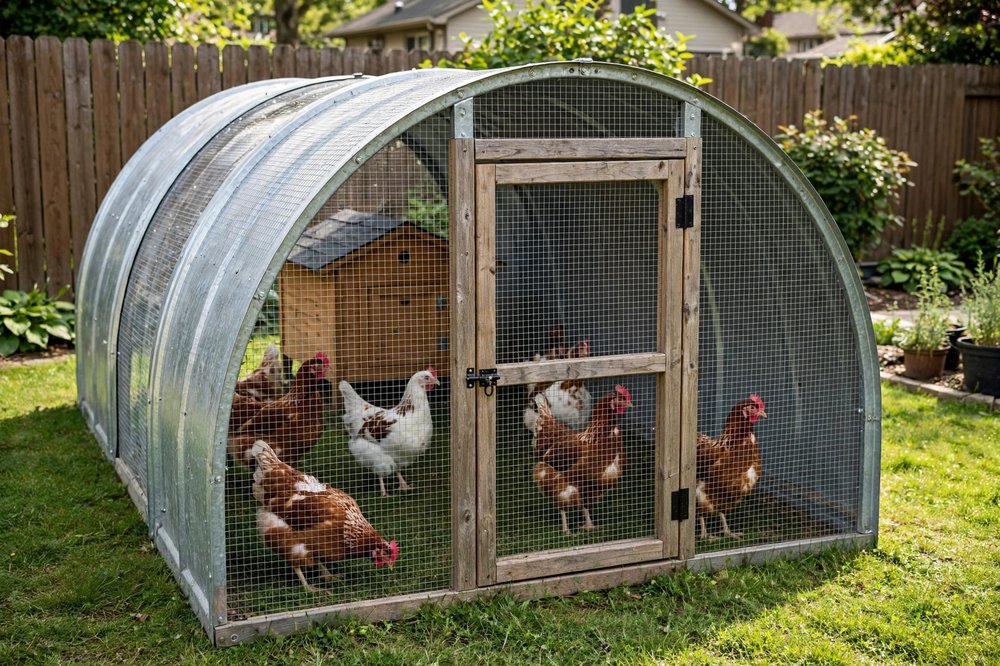
How a cattle panel hoop works
A standard cattle panel is 16 feet long and about 4 feet wide, made of heavy galvanised rods welded in a grid. Bend one into an arch with its ends fixed to ground rails 8 feet apart and the arch stands about 6 feet tall in the middle — walk-in height from a single panel width. Run two or three panels side by side and the run stretches to 8 or 12 feet long. The panel grid alone is far too open for chickens (and far too easy for raccoons to reach through), so every design here is skinned in hardware cloth or welded wire, fixed with hog rings or UV-stable ties every few inches. Gloves are not optional: cut panel edges are vicious. However you finish it, the hoop still needs the standard defences in our predator-proofing guide — apron at the base, proper door, two-step latch.
The 12 hoop run ideas
1. The Classic Two-Panel Hoop Run
Two panels arched over an 8-foot span, two ground rails, a framed mesh door in one end and a solid or meshed back end. This is the build most hoop keepers start with, and it is genuinely a weekend project: the panels go up in an hour once the rails are set, and the slow part is skinning it neatly in hardware cloth. Set the rails on level ground and square them before the first panel moves — an arch fixed to a wonky base stays wonky forever. Leave one panel's worth of length in your plan for the door end framing; a door hung in a curved end wall needs a flat, framed opening, and building that frame first is the difference between a door that closes and a door that almost closes.
2. Three-Panel Wide Hoop Run
Add a third panel and the run grows to the size most backyard flocks actually need, with room for a dust bath zone, a perch corner and a feeder station that does not crowd the door. The structure gains rigidity from the extra panel — three arches tied together rack far less than two. This is the size where a roof covering (ideas 4 and 5) starts paying for itself, because 96 square feet of mud is a lot of mud. If you are choosing one hoop build to last a decade, this is the sensible default: big enough to not outgrow with a normal flock, small enough to skin in a day.
3. Mini Hoop Run From a Single Panel
One panel, arched tighter over a 6-foot span, makes a low tunnel run that is perfect as a grow-out pen, a broody-and-chicks nursery, or a hospital pen with headroom. At this size it is light enough to lift and move like a tractor — fresh grass for youngsters without any wheels. The low height that makes it handy also makes it a day pen, not a main run for adult standard hens. Skin it in ½-inch hardware cloth rather than welded wire: young birds and small bantams need the finer mesh, and predators know exactly which pen holds the vulnerable birds.
4. Hoop Run With a Tarp Roof
Stretch a heavy tarp over the top half of the hoop, over the mesh, and the curved roof sheds rain beautifully — a hoop is the one run shape where a tarp cannot pond, because there is no flat spot. Fix it with battens along the rails and bungees over the curve, not rope through the eyelets alone. Expect two to three seasons from a good tarp; the curve is kind to it, but UV is not. This is the cheapest route to a covered hoop, and it pairs naturally with the covered run ideas — many keepers run a tarp for the first winter, then graduate to panels (idea 5) on the same frame.
5. Hoop Run With Rigid Roof Panels
Corrugated metal or polycarbonate sheets, curved gently to follow the arch and fixed to purlins, turn the hoop into a proper roofed building. The arch is a gift here: snow slides off a curve that would sit and crush a shallow flat roof, which is why hoop runs are the budget answer in snow country. Overlap sheets generously on a curve (they open at the edges as they bend) and use foam closures at the ends. Leave the lower third of the curve as open mesh on both sides for airflow — a fully sheeted hoop in summer sun becomes an oven with a door.
6. Hoop House With the Coop Inside
Stretch the hoop to four panels and put a compact coop inside one end, under the arch. The whole flock's world — roost, nests, run — lives inside one strong shell, and there is no coop-to-run joint for predators to probe or weather to rot. You lose the coop's footprint from the run area, so size up a panel from your first instinct. Servicing is pleasant: everything is under one roofline, dry in all weathers. Ventilation needs thought at the coop end — the arch sheds air upward, so mesh gable vents at both ends keep it moving. This is the hoop equivalent of the coop-inside layout in our walk-in ideas, and for windy, exposed sites it may be the better of the two.
7. Hoop Run on a Raised Timber Base
Mount the panels on a low timber wall — 12 to 18 inches of framed, meshed base — and you gain headroom at the edges where you actually stand, plus a level foundation on ground that is not. The base wall takes the digging and levelling pain once, and the arch sits on it dead square. It also lifts the panel ends out of the wettest soil, which is where galvanising dies first. Anchor the base properly: a hoop is a sail in a storm until it is fixed down, and a raised base gives the wind more to push on. On the plus side, the base wall is the perfect place for the hardware-cloth apron — staple it before the wall goes down and it is buried neatly forever.
8. Hoop Tractor on Skids
Build the hoop on two stout skids instead of fixed rails, keep the skin light, and tow it with a rope or the mower. You get a movable run with genuine headroom — the thing standard tractors cannot offer — that still rotates the flock onto fresh ground. It is a two-person or machine move; nobody drags 80 square feet of steel arch by hand twice a day, so be honest that moves will be weekly, and stock it accordingly (fewer hens than a daily-moved tractor). The full mobile picture is in our chicken tractor ideas; the hoop version is the heavyweight champion of that family.
9. Extended Hoop: Add Panels as the Flock Grows
The hoop's party trick: it extends by unbolting one end wall, arching in another panel or two, and re-hanging the end. No other run design grows this cleanly. Each added panel buys about 32 square feet — three hens' worth — for the price of the panel and its mesh skin. Plan the growth when you build the first version: keep the end wall a simple framed rectangle that unbolts, run the ground rails long or in joinable sections, and keep a note of the mesh you used so the extension matches. This is the natural partner to the add-on thinking in our extension ideas.
10. Greenhouse Hoop Conversion
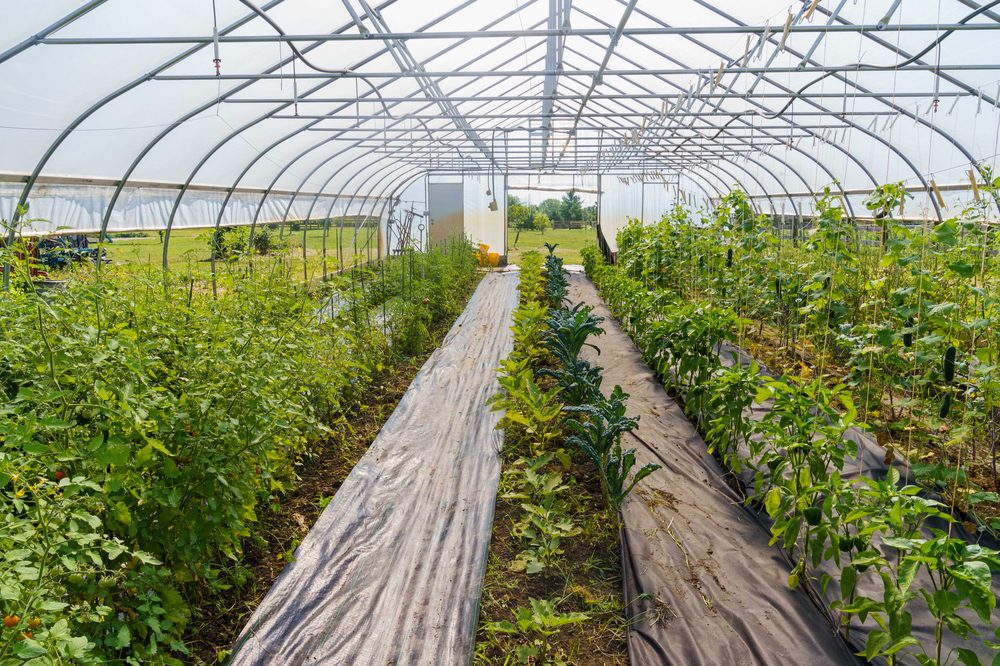
A farm high tunnel is a hoop house that outgrew vegetables: swap torn plastic for mesh on the sides, keep solid cover on part of the roof, and you have a huge, tall run for the price of the skin. The scale changes the keeping style — at 200 square feet you can deep-litter the floor, zone it with internal fences, and house a serious flock under one arch. Ventilation is the whole game at this size: roll-up or removable side mesh for summer, because a tunnel this big holds heat like a greenhouse, which is literally what it was. In winter, that same heat-holding becomes the flock's favourite sun room. Check the frame's feet before you start; tunnel hoops rot at ground level first.
11. Winter Hoop: Plastic-Covered Cold-Weather Run
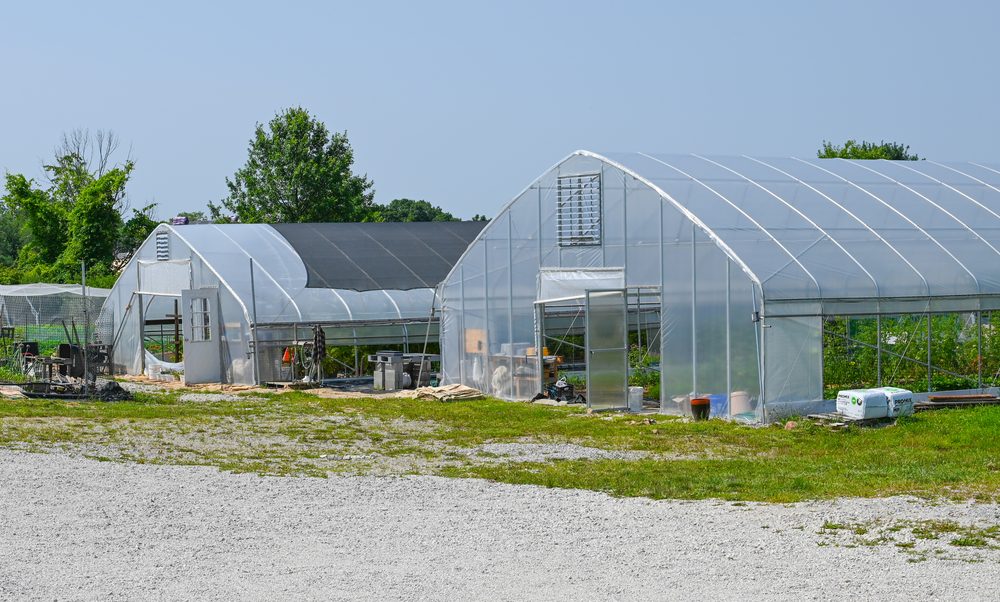
Cover the hoop in greenhouse plastic for winter and it becomes a sun-warmed, wind-proof run where hens scratch on unfrozen ground while snow sits outside. Farm hoop houses work on exactly this principle for livestock, and at backyard scale it is just as effective. The discipline is ventilation: even in January, open the ends on sunny days, because a sealed plastic hoop in low sun still overheats and the humidity is worse for hens than the cold. Come spring, the plastic comes off and the mesh hoop breathes again. Budget the plastic as a consumable — two winters is a good life — and store it dry and folded, not balled in a corner.
12. Double Hoop: Two Arches, One Big Run
When one hoop is not enough, build two side by side sharing a centre rail line, with a connecting pop door in the shared wall. The flock gets two zones — invaluable for resting one side's ground while the other is in use, or splitting groups at integration time — and you get a structure whose total cost per square foot beats any framed alternative at this size. Roof one hoop and mesh the other for the classic sun-and-shelter combination. Mind the valley between the arches: rain and snow collect where the curves meet, so gutter or bridge that channel deliberately rather than discovering it in the first storm.
How to choose your hoop build
Most keepers should start with idea 1 or 2 — the classic two- or three-panel run — and add a cover (idea 4 or 5) when the first wet season makes the case. If the flock will grow, build idea 2 with idea 9 in mind: bolted end wall, joinable rails. On pasture, the skid version (idea 8) earns its keep; in snow country, the rigid-roof or winter-plastic versions (ideas 5 and 11) are the honest answers. However big you go, check the total against the sizing guide — a hoop's generous feel makes it easy to overstock, and the hens will correct your arithmetic if you do.
Building day: the order of work
1. Rails first, dead level. Set the two ground rails parallel, at your chosen span, on ground you have actually levelled — an arch amplifies a wonky base. Measure the diagonals; equal diagonals mean a rectangle, and a rectangle means the panels arch evenly instead of twisting.
2. Arch the first panel with help. Two people walk a panel up and over, one on each side, while a third fixes the ends to the rails. Panels are springy and heavier than they look; this is the one step in the whole build where solo working is genuinely foolish. Fix both ends before letting go.
3. Add panels and tie them together. Each subsequent panel overlaps the previous one's edge and gets hog-ringed or tied to it along the seam, so the arches act as one shell. Add a ridge line of ties or a purlin along the top if the run is more than two panels long.
4. Frame the ends before skinning. Build the flat end frames — door end first — while you can still walk in and out freely. Skinning the curve is much easier than framing around a finished skin, and the door frame sets the end's shape.
5. Skin from the bottom up. Hardware cloth goes on in horizontal runs, starting at the base, each run overlapping the one below. Fix to every panel rod the mesh crosses at the seams, and loosely elsewhere; a skin fixed only at its edges drums, sags and works its fixings out.
6. Apron, door, latch — in that order. Lay the ground apron while the base is still accessible, hang the door, then fit the two-step latch and stand back like a raccoon: pull, push, lift, reach through. Whatever you can do in ten seconds, a raccoon can do in a night.
Anchoring and storm-proofing
A hoop run's curve sheds wind better than a flat wall, but it is still a large light structure, and its enemy is uplift: wind getting under a roof cover and lifting. Anchor the rails with ground screws or stakes at every panel, keep roof covers battened at the edges rather than only tied, and on exposed sites add a diagonal brace inside each end. After the first big storm, walk the run and re-tighten every fixing — new structures settle, ties stretch, and the second storm is the one that finds the loose corner.
Hoop chicken run FAQs
Are cattle panels strong enough for a chicken run?
Yes — they are built to contain cattle, and arched they are stronger still. The panel is never the weak point; the mesh skin, the base fixings and the door are. Spend your attention (and money) there, and anchor the structure against wind uplift.
What mesh should cover a hoop run?
Half-inch hardware cloth is the predator-proof standard, especially on the lower half and ends. Welded wire with small apertures is acceptable in low-pressure areas. The panel grid itself (roughly 6-inch openings) stops nothing — not hens, not raccoons — so the skin is not optional.
How tall is a cattle panel hoop run?
Arching a 16-foot panel over an 8-foot span gives roughly 6 feet at the ridge — genuine walk-in height in the middle, less at the sides. Widen the span and the ridge drops; narrow it and the arch rises but the walls steepen. A raised base (idea 7) buys back edge headroom.
Will a hoop run survive snow?
Better than most budget structures — the arch sheds load sideways instead of carrying it flat. Deep, wet snow can still overload any run, so steepen the arch where you can, keep rigid covers smooth so snow slides, and knock off exceptional accumulations rather than testing the theory.
Can I move a hoop run?
A mini hoop (idea 3) lifts and carries. Full-size hoops move only if built for it — on skids (idea 8) with a tow vehicle. A hoop fixed to ground rails on a levelled site is a stationary structure; plan its position as permanent.
How long does a cattle panel hoop run last?
The panels themselves are galvanised steel with a working life well beyond a decade; the parts that age are the mesh skin's fixings, any tarp or plastic cover (two to three seasons), and timber rails at ground level. Re-tie the skin and check the rails each spring and a hoop run is one of the longest-lived budget structures you can build.
Can I build a hoop run by myself?
Mostly, with one exception: arching the first panel is a two-person job — the panel is springy, awkward and determined to be somewhere else. Everything after that (tying panels, framing ends, skinning, the door) is patient solo work, and many keepers borrow a helper for twenty minutes on arch morning and do the rest alone over a week of evenings. If you truly have no helper, arch the panel against a fence or wall as the second pair of hands, and fix one end before walking the other into place.
Ready to build one properly?
Our free starter plan — the Backyard Run, 8′ × 16′ — is a framed design, but its materials list and panel-by-panel approach transfer directly if you are weighing hoop vs framed for the same footprint.
Pin it for later