11 Greenhouse Chicken Run Ideas for Cold Climates
A greenhouse and a chicken run want the same things: light, shelter from wind, and a structure that sheds weather. Put hens inside a tunnel or hoop house for the cold months and you get the warmest, brightest, driest winter run there is — and in spring, the birds move out and the tunnel goes back to tomatoes, leaving behind ground they have weeded, fed and turned for you. These eleven greenhouse chicken run ideas are written for cold climates, where that winter warmth is worth real money.
One warning runs through the whole list: a tunnel that is a paradise in January can be an oven in July. Every idea below assumes ventilation you can open wide — roll-up sides, big end doors, removable panels — because a sealed greenhouse in sun heats faster than any other structure in the garden. If you take one rule from this page, take that one. For the wider cold-weather picture, see our winter chicken run ideas; for sizing, the usual rule applies — 10 square feet per hen — and the finished structure still needs to meet the predator standard at its doors and skirts.
Before you start: the three greenhouse rules
Siting. A tunnel run wants the same site as a greenhouse: the sunniest, best-drained ground you have, with its long axis east–west so the low winter sun works along the whole south side. Keep it out of frost pockets at the bottom of slopes, and out of the drip line of big trees, which drop both shade and limbs. If the only available site is windy, that is an argument for the tunnel, not against it — a well-anchored hoop is one of the most wind-tolerant structures in the garden — but anchor it for the worst storm of the decade, not the average one, and check the fixings every autumn before the birds move in.
Ventilation first. Fit the biggest openings you can — ideally both ends open fully, plus roll-up or removable side panels — and test them on the first sunny day before birds move in. Shade second. Even in cold climates, plan a shade cloth or a whitewash option for bright spring weather; hens in a tunnel have nowhere to escape the sun. Ground third. Tunnel floors for hens want a deep bed of woodchip or straw over the soil, refreshed through the season; bare tunnel soil under birds turns to dust in summer and mud in the thaw. Get those three right and almost any tunnel becomes a good run.
1. The Retired Polytunnel Frame, Re-Skinned in Mesh
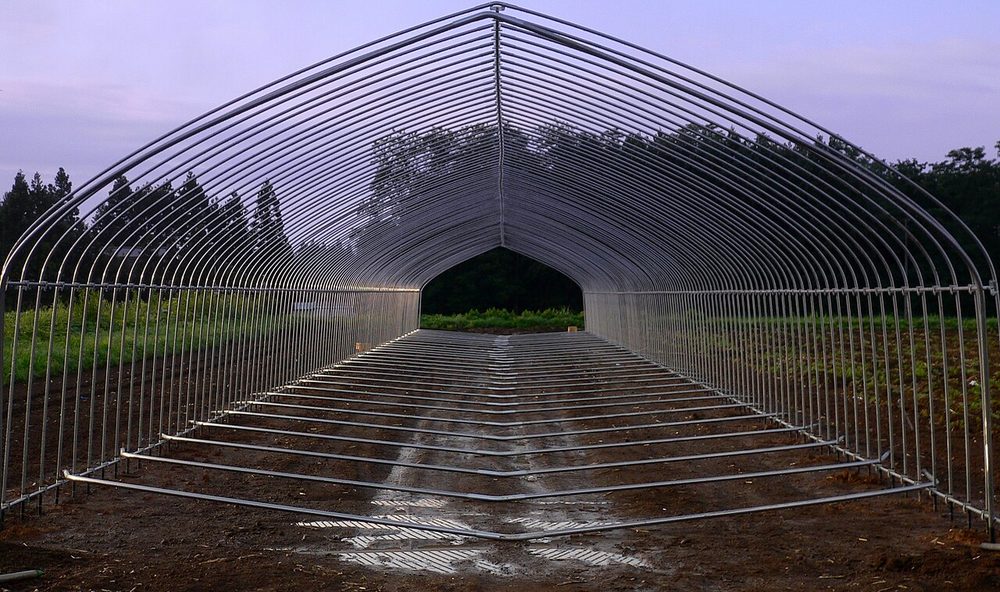
Every allotment and market garden has one: a polytunnel whose plastic tore years ago, standing as bare hoops. Skin that frame in mesh instead of plastic and you have a run with a proven structure, real headroom, and a shape that sheds snow and wind. The frame was engineered for weather; you are just changing its coat.
Mesh the whole thing in welded wire or hardware cloth on the lower walls, fix a proper framed door in one end (the tunnel's own door frame is usually sound), and skirt the base with an apron of cloth laid flat. Leave the top third ready to accept plastic or shade panels seasonally — many keepers run mesh-only in summer and sheet one end in winter, which makes this the most adaptable structure on the page.
2. The High-Tunnel Winter Run
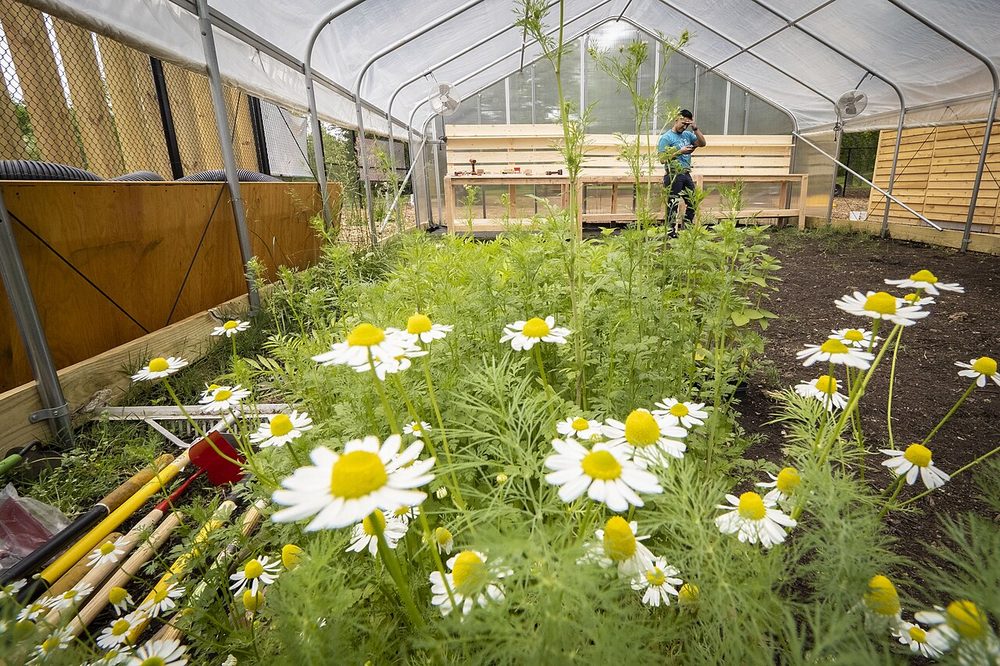
Market growers overwinter hens in high tunnels for a practical reason: the birds get a bright, dry, wind-free barn-sized space, and the tunnel gets a winter tenant that fertilises and cleans the beds. If you have access to a used high tunnel — they change hands cheaply when farms upgrade — this is the most capable winter run a backyard-plus flock can have.
Fit it out like a barn, not a greenhouse: deep bedding everywhere, roosts along one side, feeders and water at the door end, and the pop door to an outside yard for mild days. The plastic stays on for winter, so ventilation is the daily discipline — open the ends whenever the sun is out, even in frost. Come spring the flock moves out, the bedding is compost gold, and the tunnel plants straight into ground the hens prepared.
3. The Hoop House Pasture Run
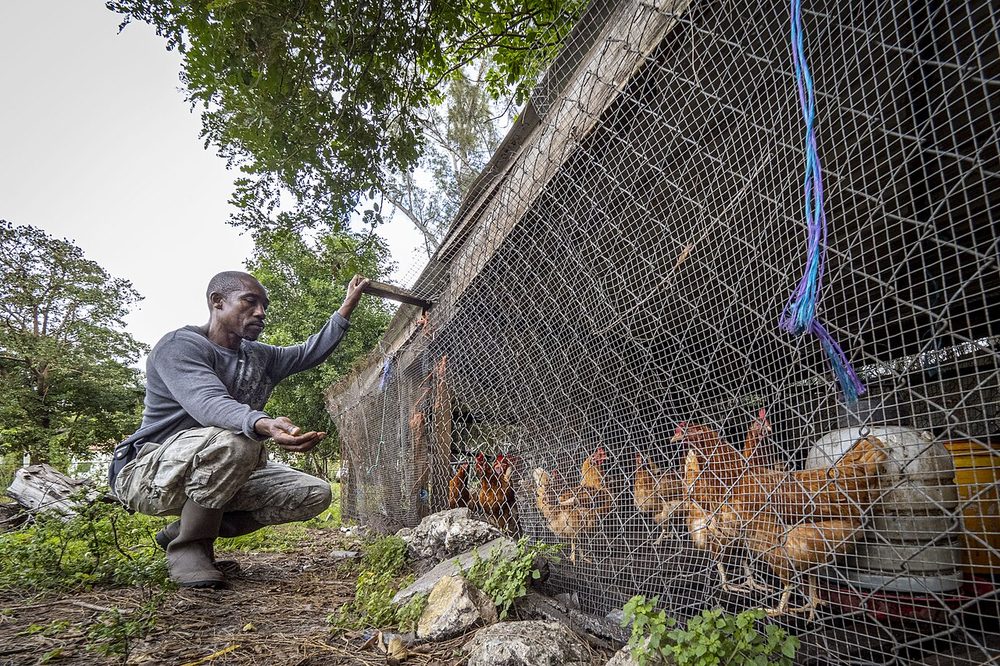
Scale the hoop idea up and it becomes the pasture flock's headquarters: a wide mesh hoop house that serves as the secure night-and-storm base, with ranging outside it by day. The arch handles wind that flattens rectangular sheds, the mesh keeps the inside bright and aired, and a tarp or sheet over the back third gives a weatherproof roosting end.
Anchor it like you mean it — a big hoop is a sail until it is staked, screwed to ground rails, or ballasted. Site it on the driest ground you have, because everything the flock does in bad weather happens inside it. This is the working end of greenhouse keeping: less about winter tomatoes, more about a structure that earns its keep in every month, in the same family as the hoop builds in our main ideas list.
4. The Framed Tunnel Run with a Mesh Roof
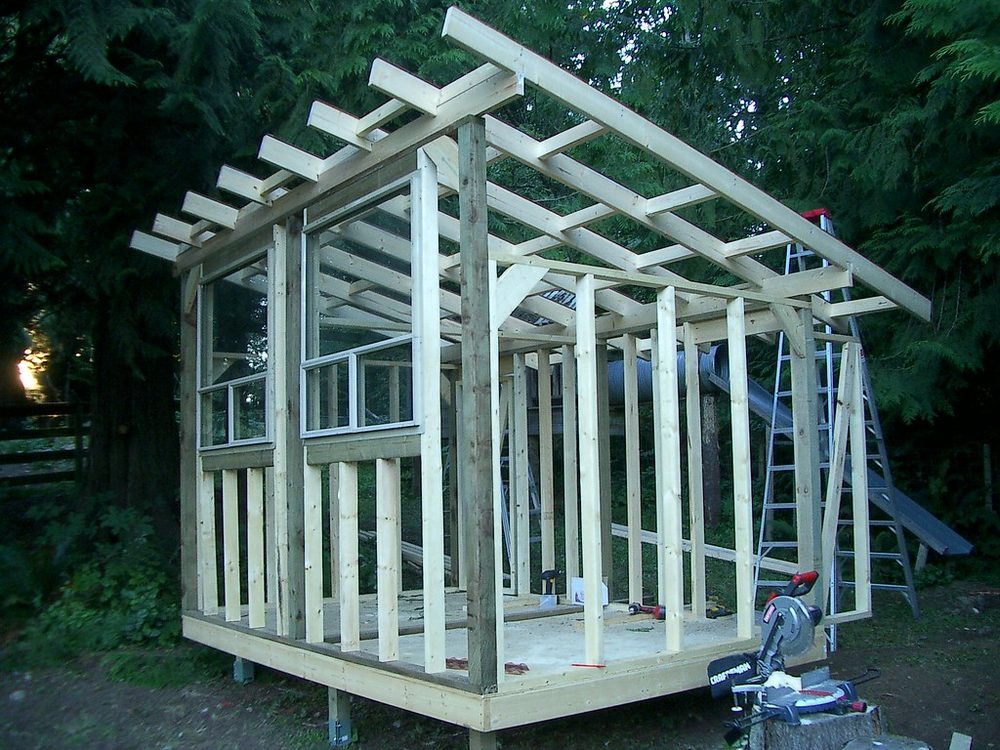
Not every tunnel is bent plastic or steel — a timber-framed tunnel, with curved or pitched mesh roof sections on wooden ribs, gives the greenhouse shape with a garden-run build. It suits a permanent backyard better than a farm tunnel: smaller, prettier, repairable with ordinary tools, and happy to take solid roof panels over part of its length.
The framed tunnel's strength is zoning. Roof the back half solid for a dry roosting and feeding end, mesh the front half for light and air, and the flock self-sorts by weather. Build the ribs as identical sections on the ground and the whole thing goes up true. It is also the easiest tunnel to extend — add a rib bay and a few feet of mesh and the run grows with the flock.
5. The Barn-Interior Winter Run
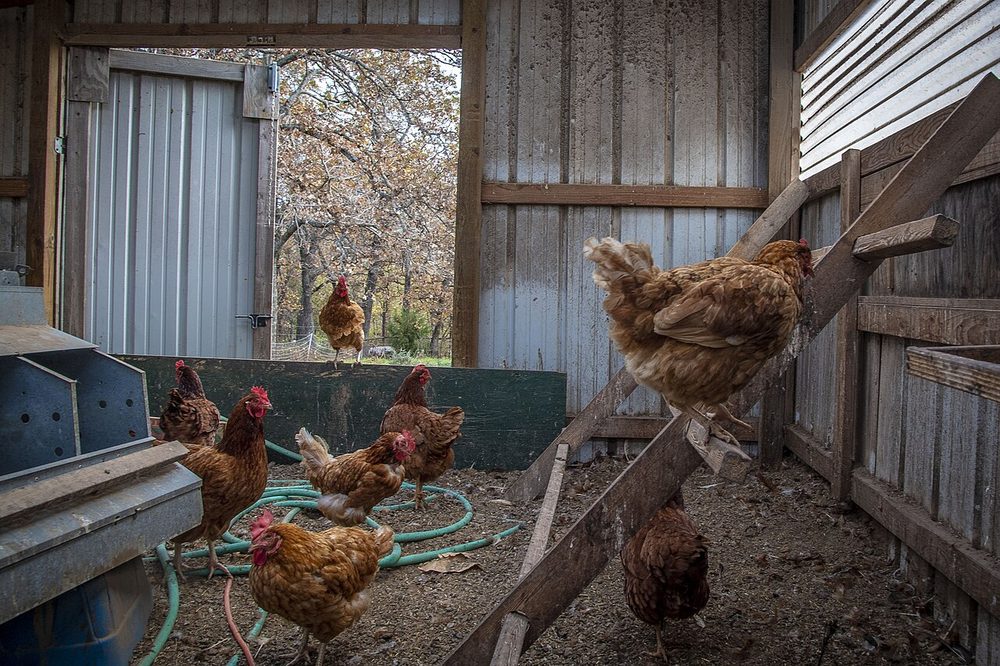
The oldest greenhouse of all is a bright barn: a spare bay, a hoop barn's end, or a machinery shed's lean-to, meshed off and bedded deep, makes a winter run with total weather protection and farm-sized air volume. Hens get a dry, draught-free hall; you get chores under a roof with the lights already wired.
Mesh the open side fully and fit the pop door to the yard for the days the flock can range. The interior discipline is bedding and light: deep litter handles the floor, and if the bay is dark, a translucent panel swapped into the roof or wall transforms it. This layout pairs naturally with the barn-side attached design in our coop-attached ideas — the barn is the coop wall and the winter run in one.
6. The Field Shelter Tunnel
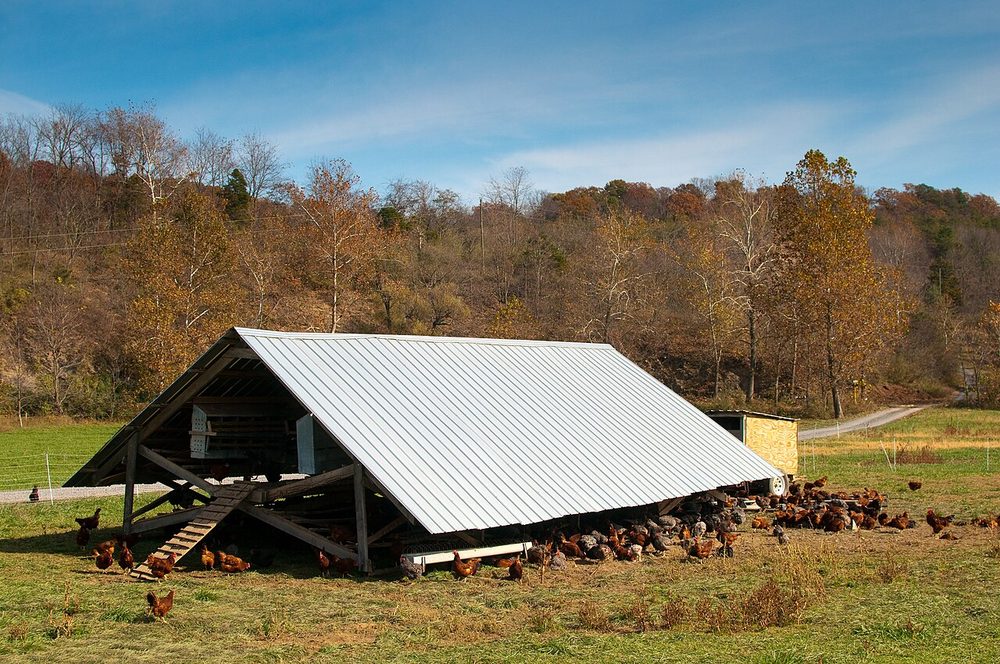
A low, wide field shelter — part tunnel, part barn — is the free-range flock's storm base: hens range out in all but the worst weather and pile into the shelter when it turns. The low profile sits under the wind, the wide opening lets the whole flock in at a run, and a solid roof over deep bedding keeps the inside workable through the wettest month.
Position is everything: shelter mouth away from the prevailing wind, on rising ground, within sight of the ranging area the flock actually uses. A shelter in the wrong field is an ornament. Keep feed and water just inside the mouth so a hen caught by a squall finds everything in one dash, and expect the ground at the entrance to need gravel or a slab by midwinter.
7. Half-and-Half: Half Tunnel, Half Open Run
Join a tunnel section to an open mesh run and the flock gets both climates in one enclosure: under cover for storms and winter, out in the open for summer and mild days, with no gate-keeping from you. It is the layout that best matches how hens actually use space across a year, and it removes the tunnel's one big risk — there is always somewhere cooler to go.
Put the coop at the tunnel end so roosting happens in the warmest, driest zone, and let the open run carry the dust bath and the summer shade structure. The junction between tunnel and run is a natural place for a closable divider, which gives you a separation pen for new birds or a way to rest half the ground. If you build one structure from this whole page, build this one.
8. The Greenhouse End-Wall Coop Combo
Build the coop into the tunnel's end wall — inside the tunnel's envelope — and the two structures start helping each other. The coop gains the tunnel's shelter and a measure of its warmth; the hens step from the roost straight into a bright, dry run without crossing weather; and you do the morning round under cover from door to door.
Ventilate the coop independently of the tunnel, with its own vents to outside air, because coop air is damp and ammonia-bearing and the tunnel does not need it. Keep the coop's roofline below the tunnel's curve with room to spare for hot air to pass over. And give the tunnel end its own external door beside the coop, or every egg collection becomes a walk through the flock.
9. The Cold-Frame Brooder Run
Scale the greenhouse down and it becomes the best chick-raising tool there is: a cold frame or mini tunnel gives growers and a broody hen a sun-warmed, rain-proof, predator-meshed space weeks before the weather would allow them outside. Chicks raised with real daylight and ground access feather faster and hardier than chicks kept under a lamp indoors.
Mesh every opening, including under the lights (the glass or plastic top panels), because a cold frame that admits a sparrow admits everything smaller than a sparrow too, and chicks are snack-sized. Prop the top open a crack even on cold sunny days — a small tunnel in March sun can overheat by noon, and chicks cannot move away from heat in a small space. A thermometer at chick height is a two-dollar instrument that prevents the one real disaster this idea can have.
10. The Solar Tunnel (Sun-Warmed, Ridge-Vented)
In a bright continental winter — hard frost, strong sun — a tunnel oriented east-west with its long side to the south becomes a solar collector: hens work in shirtsleeve air while snow lies outside. A ridge vent or a high gable vent is what makes it controllable, letting the hottest air leave at the top instead of cooking the flock at midday.
Dark ground inside multiplies the effect, so keep the bedding deep and soil-toned rather than pale. On overcast stretches the solar gain vanishes and the tunnel is simply a good dry run, which is fine — the design brief is to harvest the sunny days, not to promise tropical ones. If your winters are grey rather than bright, spend the same money on the half-and-half (#7) instead; this idea is climate-specific and proud of it.
11. The Summer-Shaded Tunnel
The tunnel you built for winter can stay in service through summer if you treat the cover as seasonal clothing: plastic off or rolled right up, shade cloth over the top half, mesh beneath. Hens get a breezy, shaded pavilion with total hawk protection — often the most comfortable run on the property in a heatwave, because air moves through it end to end.
Shade cloth at 70–90% over the sunny side, fixed so wind cannot worry it loose, is the whole recipe. Keep one end's worth of ground as the dust bath in deep shade and the flock will live in the tunnel voluntarily on hot afternoons. The discipline is the changeover: pick your spring and autumn weekends, because a tunnel still wearing its winter plastic in the first May heatwave is the one genuine emergency this page can create. Our roof ideas cover shade cloth fitting in more detail.
How to choose a greenhouse run
Start from what you already have. A dead polytunnel frame is idea #1 and costs mostly mesh; a spare barn bay is #5 and costs mostly bedding; a growing tunnel that stands empty all winter is #2 waiting to happen. Building new, the half-and-half (#7) is the safest all-climate answer, and the framed tunnel (#4) is the best backyard-scale permanent build.
Then check your winter honestly. Bright and cold argues for the solar tunnel (#10); grey and wet argues for maximum cover and drainage, and for pairing the tunnel with the ground systems in our winter run ideas — deep litter, wrapped walls, mud control. Whatever you choose, fit the ventilation before the birds, and never let a tunnel's winter comfort talk you into sealing it: in greenhouse keeping, air is life. Budget a spare hour each autumn to check hoops, fixings and covers before the season turns — tunnels fail in storms, not in calms, and autumn is the last moment you can do anything about it.
Greenhouse chicken run FAQs
Will a greenhouse run get too hot for hens?
In direct sun with the vents closed, yes — dangerously fast, in any season. That is why every design here assumes big openings at both ends plus side ventilation, and why the keeper's rule is to open up on any sunny morning, even a frosty one. Managed that way, a tunnel is warmer than outside in winter without ever being hotter than the flock can handle; unmanaged, it is the one run type that can genuinely cook birds. Never leave hens in a sealed tunnel on a sunny day.
Can hens live in a greenhouse all winter?
Yes — that is the point of the high-tunnel and half-and-half designs. They need the same things as in any run: 10 square feet each, roosts, nest boxes, water that does not freeze, and ventilation that keeps the air dry. What the tunnel adds is light, calm air and dry ground. What it must never subtract is fresh air; a tunnel that smells of ammonia is a tunnel that needs its ends opened, whatever the temperature outside.
What should the floor of a greenhouse run be?
Deep bedding over the soil — woodchip, straw, or a mix — built up through the season. It keeps feet dry, gives the flock scratching work, absorbs manure, and comes out in spring as garden-ready compost. Avoid bare soil (dust in summer, mud in the thaw) and avoid solid floors in a tunnel, which trap the damp the structure is meant to defeat. Top the bedding up little and often rather than in one deep dump, and fork out the finished layer in spring while it is still dry enough to barrow — tunnel compost is rich stuff, and the growing season that follows the hens will show it.
Do greenhouse runs attract predators?
They attract attention because hens are visible and smellable, and plastic alone stops nothing with teeth. The structure must be finished like any run: mesh or cloth at the base that a fox cannot chew, a ground apron, framed doors with two-step latches, and no gaps where the cover meets the ground. A tunnel's frame is strong; its skin is the weak point, so that is where the predator budget goes.
Can I grow plants in the tunnel while hens are in it?
Not in the same space at the same time — hens eat seedlings, scratch out roots and dust-bathe in beds. The greenhouse rotation works in sequence: hens in winter, plants in summer, each preparing the ground for the other. The exception is hanging or high-shelved plants well out of reach, and tough established shrubs in large runs, which hens mostly ignore. Plan the tunnel's year as two seasons with two tenants.
How much does a greenhouse chicken run cost?
Re-skinning a frame you own can land near $120–$260 in mesh and fittings. A used high tunnel fitted out runs roughly $400–$900. A new framed backyard tunnel sits around $260–$450 in materials. All figures are 2026 estimates, and the pattern is consistent: the structure is the cheap part if it already exists, and mesh, doors and bedding are where the real money goes. Second-hand structures change the maths completely, which is exactly why the retired-frame ideas sit at the top of this list.
Ready to build one properly?
Our free starter plan — the Backyard Run, 8′ × 16′ — gives you the full materials list, tool list and step-by-step build outline for a permanent run that holds up to 12 hens, and frames cleanly against a tunnel or hoop house.
Keep planning
Winter Chicken Run Ideas
The full cold-weather toolkit, tunnel or no tunnel.
Chicken Run Roof Ideas
Covers, panels and shade: roofing every structure here.
15 Cheap DIY Chicken Run Ideas
The main list, including the original greenhouse-frame build.
Pin it for later