Improving your backyard patio doesn’t have to cost a fortune. With a little creativity and elbow grease, you can create a cozy, inviting space perfect for weekend hangouts, evening catch-ups, or even impromptu celebrations. The key is to focus on comfort, function, and fun—all without breaking the bank. Whether you’re working with a concrete slab, a patch of grass, or a deck, these budget-friendly ideas will help you make the most of your outdoor space.
Here are 19 practical, low-cost ways to level up your patio and get it ready for casual gatherings with friends and family.
1. Colorful Outdoor Rugs

Colorful outdoor rugs are a simple yet powerful way to refresh your patio without spending a lot. They help define areas, add personality, and bring indoor comfort to outdoor spaces. Whether you have a bare concrete slab, a wooden deck, or pavers, an outdoor rug can instantly make the space feel more like a “room.” It adds warmth, encourages people to linger, and visually ties furniture together.
Look for rugs made from polypropylene or other weather-resistant materials. These are designed to handle sun, rain, and heavy foot traffic without fading or getting moldy. They’re also low-maintenance—you can sweep them off or hose them down when needed. Most outdoor rugs range from $20 to $100 depending on the size, which makes them an affordable upgrade even for tight budgets.
When choosing a rug, think about how it fits with the rest of your setup. If your furniture is neutral, try a bright or patterned rug to create a focal point. If you already have colorful furniture or decor, go with a more subdued design. Rugs are also great for dividing up space. Place one under a dining table or another in a lounge corner to help separate activity areas without any physical barriers.
To install, just sweep the area clean and roll it out. If it shifts around, add a non-slip rug pad or secure it with outdoor rug tape. This upgrade requires almost no tools—just a broom and a bit of time. A good-quality rug not only improves comfort underfoot but also encourages guests to kick off their shoes and relax. It’s one of the easiest ways to add instant charm to your patio while keeping things budget-friendly and functional.
2. Picnic Table DIY
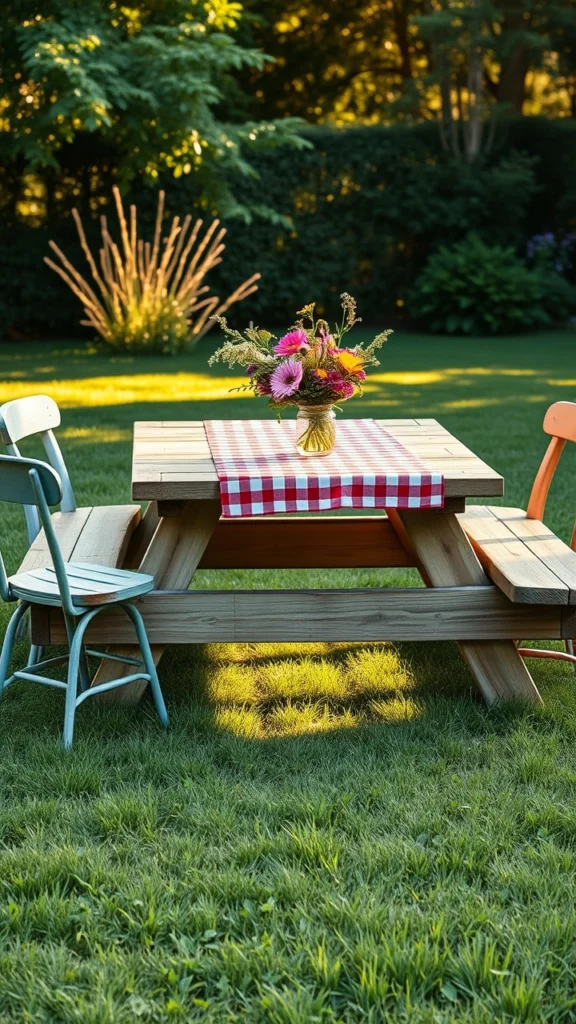
A DIY picnic table is a classic and practical addition to any backyard patio. It provides a central spot where everyone can gather—whether it’s for meals, card games, or just casual conversation. Unlike smaller side tables or scattered seating, a picnic table creates a sense of unity. It’s a welcoming, all-purpose hub that encourages people to sit together and stay longer. Best of all, building one yourself can save money and be a satisfying weekend project.
To get started, you’ll need some basic materials and tools: a few 2x4s (or 2x6s if you prefer a heavier look), wood screws, a saw, a drill, and a measuring tape. If you’re on a tighter budget, consider using reclaimed wood—old pallets or leftover lumber from past projects can work well with a bit of sanding. Look up free picnic table plans online; many sites offer beginner-friendly tutorials with clear measurements and step-by-step instructions.
The cost of materials for a basic table typically falls between $50 and $100, depending on the size and the type of wood you choose. After cutting and assembling the frame and tabletop, you can seal or paint the wood to protect it from the weather and match your outdoor aesthetic. Choose a waterproof outdoor sealant or weather-resistant paint to ensure your table lasts through multiple seasons.
This DIY is great even for beginners. With a few hours of effort, you’ll end up with a sturdy, useful piece of furniture that adds real value to your space. You don’t need advanced carpentry skills—just the willingness to follow directions and use a few simple tools. The end result is a cozy gathering spot that will quickly become the heart of your patio, all without breaking the bank.
3. Portable Seating Options
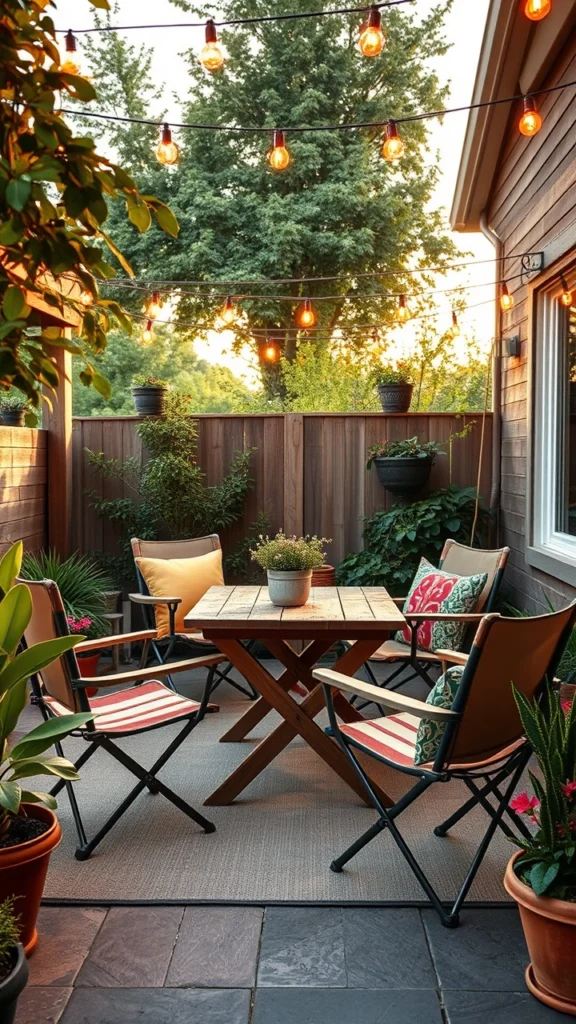
Portable seating options are a must-have for any casual backyard gathering. Unlike fixed benches or heavy furniture, items like folding chairs, stackable stools, or even oversized floor cushions give you the flexibility to adapt your setup based on how many guests show up. Whether you’re hosting a quiet evening with two friends or a lively group of ten, having extra portable seating means no one ends up standing awkwardly or searching for a place to sit. These pieces are easy to move around and can be stored away when not in use, freeing up space for games or other activities.
You don’t have to spend much to build up your collection. Look for budget-friendly options at thrift stores, yard sales, or discount retailers. Folding chairs can often be found for $10–$25 each, while colorful floor cushions or outdoor poufs might cost around $15–$30. Stackable stools are another smart choice—they’re compact, durable, and add a bit of height variety to your setup. If you want to make it cozier, toss in a few outdoor pillows for added comfort and style.
No tools are needed for this idea, making it one of the simplest upgrades on the list. Just arrange your seating in clusters to encourage conversation, or line them around a fire pit or table to support group activities. You can mix and match different types of seating to suit your guests’ preferences—some might like a cushioned seat on the ground, while others prefer a proper chair. This flexibility makes your patio more inviting and guest-friendly, without requiring a major investment.
With a bit of creativity and bargain hunting, you can create a welcoming, versatile seating setup that makes everyone feel at home. It’s a small change that makes a big difference when you’re trying to create a relaxed, social vibe.
4. Upcycled Planter Boxes
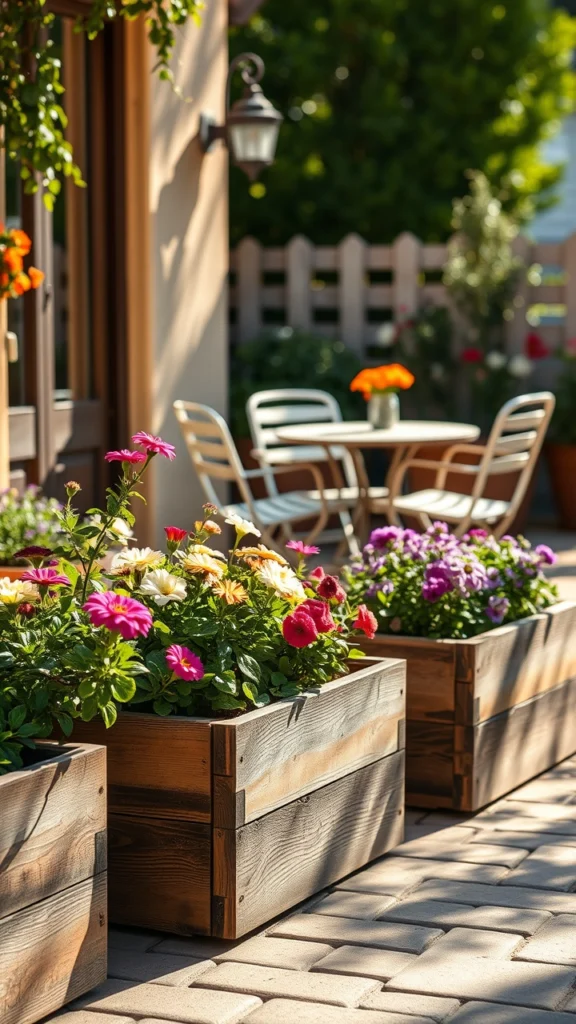
Upcycled planter boxes are a charming and eco-friendly way to add life to your patio without spending a lot. Instead of buying expensive pots, you can repurpose old wooden crates, metal buckets, or even unused kitchen containers into rustic planters. This gives your outdoor space a touch of character while also helping you reduce waste. The plants add freshness, texture, and a bit of nature to the scene—something that instantly makes your patio more welcoming for guests. Whether you’re planting herbs, flowers, or small shrubs, these upcycled planters bring visual appeal without breaking your budget.
To get started, gather any old containers you have lying around. Wooden wine crates, paint buckets, or even old drawers can work well. Just make sure the container is deep enough for roots to grow. Use a drill to create a few small drainage holes in the bottom so water doesn’t collect and rot the roots. Then, fill the container with potting soil and your choice of plants. Herbs like basil, mint, or rosemary are great if you like to cook. Flowers like marigolds or petunias can add color, while ferns or succulents offer low-maintenance greenery.
You can usually find suitable containers for free or at thrift stores for just a few dollars. Potting soil costs around $5–$10 per bag, and starter plants or seeds can be picked up for $1–$5 each. If you’re reusing a wooden box, consider lining the inside with plastic to protect the wood from moisture, and then poke a few holes in the liner to allow drainage.
Upcycled planter boxes don’t require a lot of tools—just a drill and maybe a small trowel. They’re a great DIY project for beginners and a fun way to personalize your space. Cluster several planters together for a mini garden feel or line them along a wall or pathway to frame your patio. It’s a low-cost upgrade that brings your patio to life with color, scent, and charm.
5. Repurposed Pallet Furniture
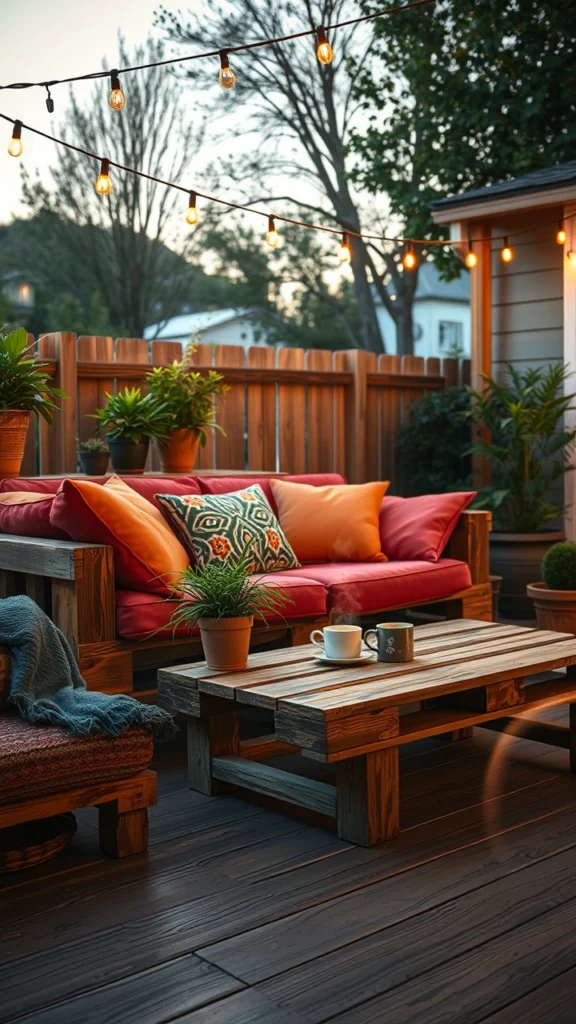
Repurposed pallet furniture is one of the most budget-friendly ways to add functional and stylish pieces to your patio. Wooden pallets are often available for free or at very low cost from hardware stores, warehouses, or online classifieds. With a little bit of work, you can turn them into outdoor couches, coffee tables, or even cozy daybeds. This kind of furniture adds a rustic, handmade look to your patio while giving you the freedom to customize everything from size to color. It’s perfect for casual gatherings because it creates a relaxed, laid-back vibe that invites guests to lounge and chat.
To start, find a few solid, undamaged pallets. You’ll want to sand them thoroughly to remove splinters and rough edges. An orbital sander makes this faster, but regular sandpaper works too. Once smooth, you can stain or paint them to match your outdoor space. Neutral tones like gray or brown work well, or go bold with bright blues or greens for a more playful look. After the pallets are finished, stack and screw them together into your desired shape. Two stacked pallets can form the base of a sofa, with a third cut and attached as the backrest. Add cushions or pillows for comfort, and you’ve got a great seating setup on a tight budget.
Pallets are usually around 40″ x 48″, making them a good size for furniture bases. You’ll need basic tools: sandpaper or a sander, wood screws, a drill, and optional paint or stain. Most of these materials are likely already in your DIY toolkit, keeping your costs low. If buying pallets, expect to pay around $5 to $10 each, though many places give them away for free.
Repurposed pallet furniture is a practical DIY that offers a big visual impact with very little spending. It’s a great way to recycle materials and create something unique that fits your patio perfectly.
6. Tiki Torch Lighting
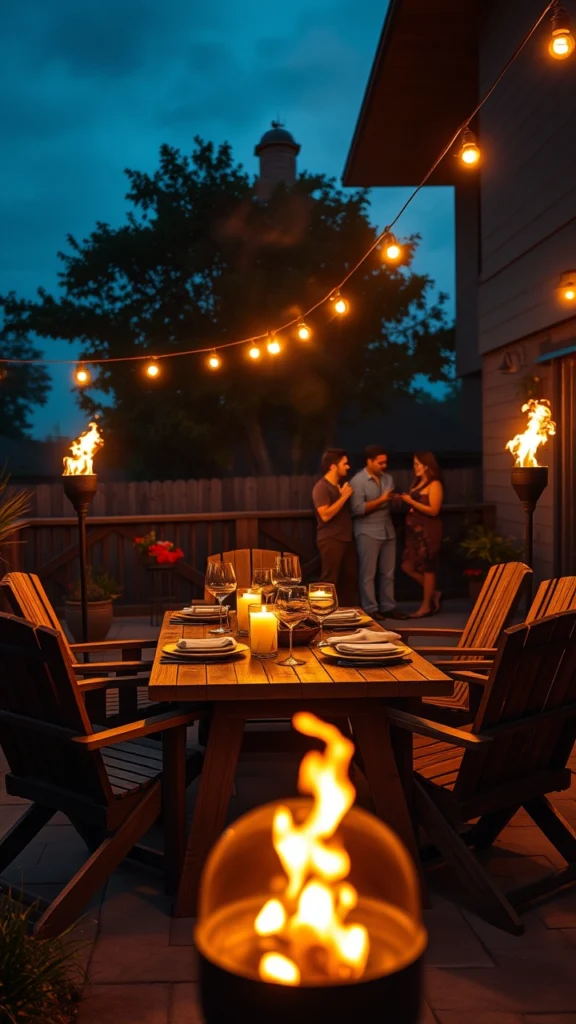
Tiki torch lighting is a quick and inexpensive way to boost the atmosphere of your patio for evening gatherings. These torches give off a warm, flickering glow that instantly makes the space feel more relaxed and festive. But they’re not just about looks—when filled with citronella fuel, tiki torches also help keep mosquitoes and other bugs away. That makes them especially useful for summer nights when you want to enjoy the outdoors without being pestered by insects. Plus, they’re easy to set up, move around, and store when not in use.
You can find tiki torches for as little as $5–$10 each at big-box stores or online. They come in different styles—bamboo, metal, or glass—so you can pick one that fits the look of your patio. Most are designed to be stuck into the ground, but you can also get tabletop versions if you don’t have grass or soil nearby. For fuel, use citronella-based torch oil, which typically costs around $10–$15 per bottle and lasts through several uses.
Setting them up is simple. Just pick a few spots around the edge of your patio or yard—maybe one near the seating area, another near the dining table, and a few more along walkways or corners. Space them out evenly to create a balanced glow. Be sure to place them away from anything flammable, and always follow the safety instructions on the label.
No special tools are needed—just the torches, the fuel, and a lighter to get them going. Within minutes, you’ll transform a plain patio into a cozy, welcoming space. The dancing flames and gentle scent of citronella set the tone for laid-back conversation, music, and outdoor fun. It’s one of the easiest, most affordable upgrades you can make to enhance both ambiance and comfort.
7. DIY Fire Pit Area
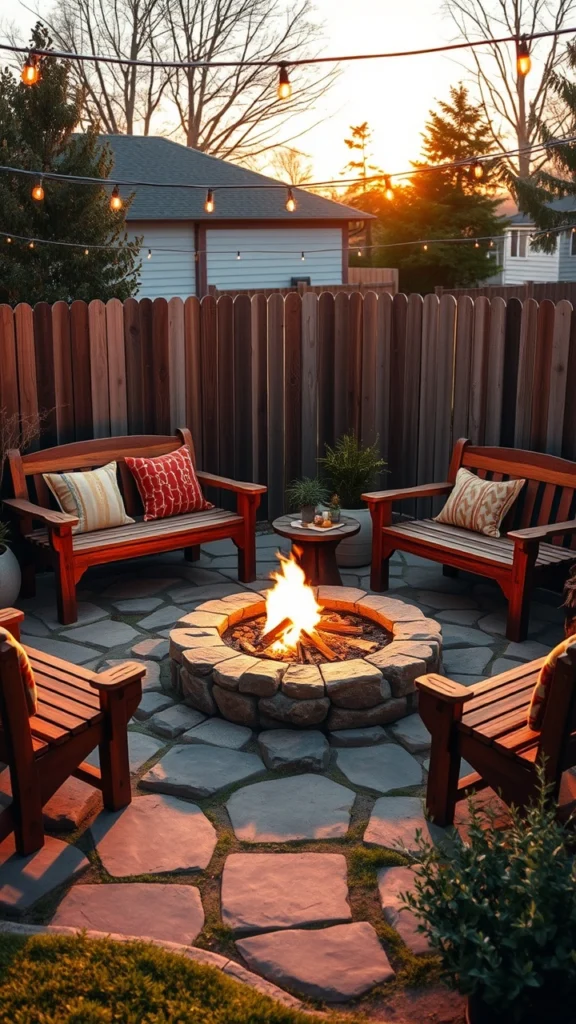
A DIY fire pit area is a fantastic addition to your backyard, creating a natural gathering spot for friends and family. There’s something magnetic about a fire—people are naturally drawn to it. Whether it’s roasting marshmallows, sharing stories, or simply enjoying the warmth of the flames on a cool evening, a fire pit becomes the heart of your outdoor space. It’s perfect for casual get-togethers and brings a cozy, intimate atmosphere to your patio.
Building a fire pit doesn’t have to be complicated or expensive. Start by selecting a location in your yard that’s flat, safe, and away from any flammable structures or trees. Using a shovel, dig a shallow pit, about 6–12 inches deep, and make sure it’s wide enough to fit a good-sized fire. Once the pit is dug, fill it with gravel to create a solid, level base that allows water to drain and air to circulate. Next, create a circle around the pit using bricks, stones, or pavers. These materials are inexpensive and easy to find at most hardware stores, with costs typically ranging from $1 to $3 per brick or stone.
The only tools you’ll need for this project are a shovel to dig the pit and a level to ensure the stones are evenly arranged. If you want to add extra style, you can even paint the stones or bricks in colors that match your patio decor. This simple, straightforward project doesn’t require any advanced skills but results in a functional and attractive feature for your backyard.
Once the fire pit is complete, you can enhance the area by adding a few outdoor chairs or benches around it, creating a warm and inviting place to relax. With minimal cost and effort, a DIY fire pit becomes the centerpiece of your patio, perfect for creating memories and enjoying outdoor living year-round.
8. Cozy String Light Setup

A cozy string light setup is one of the easiest and most affordable ways to instantly elevate your patio’s atmosphere. The soft, twinkling glow of string lights adds warmth and charm to any outdoor space, making it feel more inviting and magical. They not only enhance the ambiance but also provide functional lighting for evening gatherings, allowing guests to mingle comfortably long after the sun sets. String lights are versatile and can be used in countless ways, whether draped across fences, wrapped around trees, or hung from posts, transforming your backyard into a cozy retreat.
To set up your string lights, start by determining where you want them to hang. Common spots include tree branches, along the top of a fence, or across the perimeter of a gazebo or pergola. Measure the space first to ensure you purchase enough lights. You can find outdoor-rated string lights for around $15 to $30, depending on the length and style. If you need extra reach, make sure you have an extension cord to connect the lights to a power source.
Installation is simple—use hooks or zip ties to secure the lights in place. Hooks work well for attaching lights to trees or posts, while zip ties are great for more secure placements on fences or beams. If you’re hanging lights on a vertical surface, use a hook on each end of the string and one or two in the middle for extra support. Depending on the size of your space, you can arrange the lights in straight lines, zigzags, or even drape them loosely for a more casual look.
String lights are incredibly easy to set up and don’t require special tools. Just be sure to use lights that are rated for outdoor use, ensuring they can withstand the elements. With a little effort, you’ll create a warm, inviting space that’s perfect for late-night conversations, outdoor dinners, or simply relaxing under the stars. The cozy, soft light adds a touch of romance and fun to any casual gathering.
9. Simple Canopy Structure
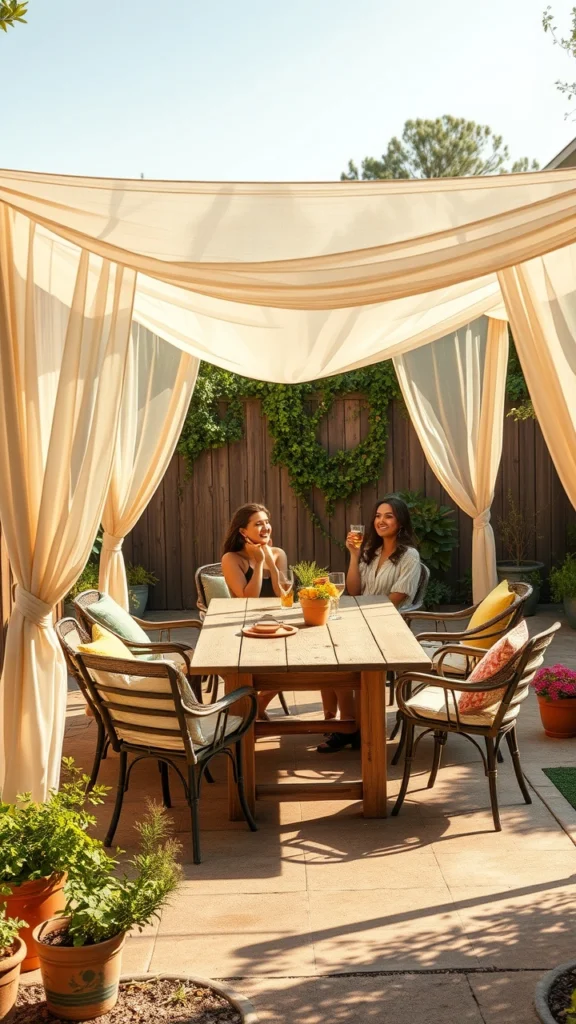
A simple canopy structure is an affordable and effective way to provide shade on your patio, making it much more comfortable for daytime gatherings. Whether it’s a hot summer day or a sunny afternoon, a fabric canopy can keep the harsh sun off your guests, allowing everyone to relax and enjoy the outdoors without the discomfort of direct sunlight. It also adds a cozy, sheltered feel to your patio, turning it into a perfect spot for dining, lounging, or chatting with friends.
To build a simple canopy, you’ll need a sturdy fabric like a canvas or tarp, which can be found for as little as $20–$40, depending on the size and material. The key is to stretch the fabric taut between poles or secure it to existing structures like walls, fences, or the corners of your patio. For poles, you can use wooden posts, metal pipes, or even repurposed materials like bamboo or PVC pipes. Arrange the poles at each corner of the space you want to cover and secure them in place with rope or stakes. If you’re anchoring the canopy to the ground, use stakes to keep everything stable, particularly if you’re setting it up in a breezy area.
Once your poles are in place, drape the fabric over them, securing it with rope or hooks. If you prefer a more professional look, you can install grommets along the edges of the fabric to make it easier to tie down. If the fabric hangs too low, you can adjust the height by raising the poles or pulling the fabric tighter. This simple setup doesn’t require a lot of tools—just a drill for the poles (if necessary), rope, and some basic hand tools for adjustments.
A fabric canopy is a great way to create a cool, shaded retreat without spending much. It provides a functional solution to heat while transforming your patio into a cozy, sheltered area for casual get-togethers, outdoor meals, or simply relaxing with a book.
10. Creative Bar Cart
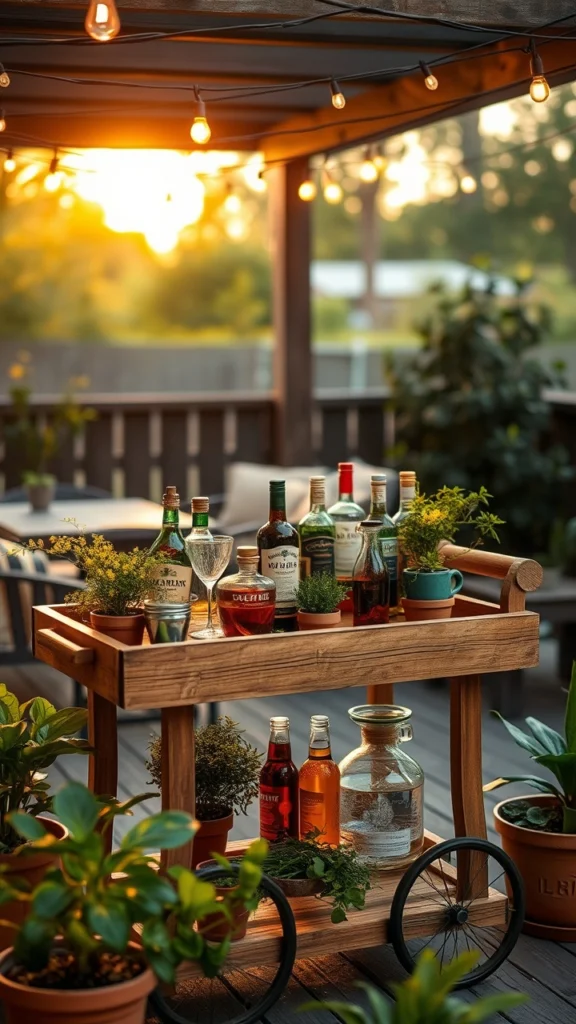
A creative bar cart is a practical and stylish way to elevate your patio for casual gatherings. It serves as both a functional and decorative piece, providing a designated space for drinks, snacks, and all the essentials for entertaining. Repurposing an old cart or shelf into a bar cart keeps everything within easy reach, so guests can help themselves or you can serve drinks without needing to run back and forth to the kitchen. Plus, it adds a touch of personality and flair to your outdoor setup, making it feel more like a cozy cocktail lounge.
To create your own bar cart, start by finding an old cart, shelf, or even a sturdy table that you no longer use. You can pick one up for a low cost at thrift stores, garage sales, or online marketplaces for around $10–$30. If you want to update its look, consider painting or staining the cart to match your patio decor. Once the cart is prepped, add storage containers, a drink dispenser, ice bucket, and your favorite drinkware (glasses, tumblers, or mugs). You can also include a small tray for snacks like nuts, chips, or finger foods. If you have space, add decorative touches such as candles or small plants to make it more inviting.
You’ll need a few basic items like storage containers for holding bottles, cups, and ice, as well as drink dispensers for larger beverages like lemonade or punch. If you plan on serving alcoholic drinks, consider adding a cocktail shaker, a small cutting board, and a knife for slicing garnishes. You may already have most of these items at home, making this a very budget-friendly upgrade.
A bar cart not only keeps your drink essentials organized and easy to access but also acts as a focal point during parties. It encourages mingling and makes serving drinks and snacks feel effortless, while adding a chic, personalized touch to your backyard space.
11. Outdoor Movie Screen
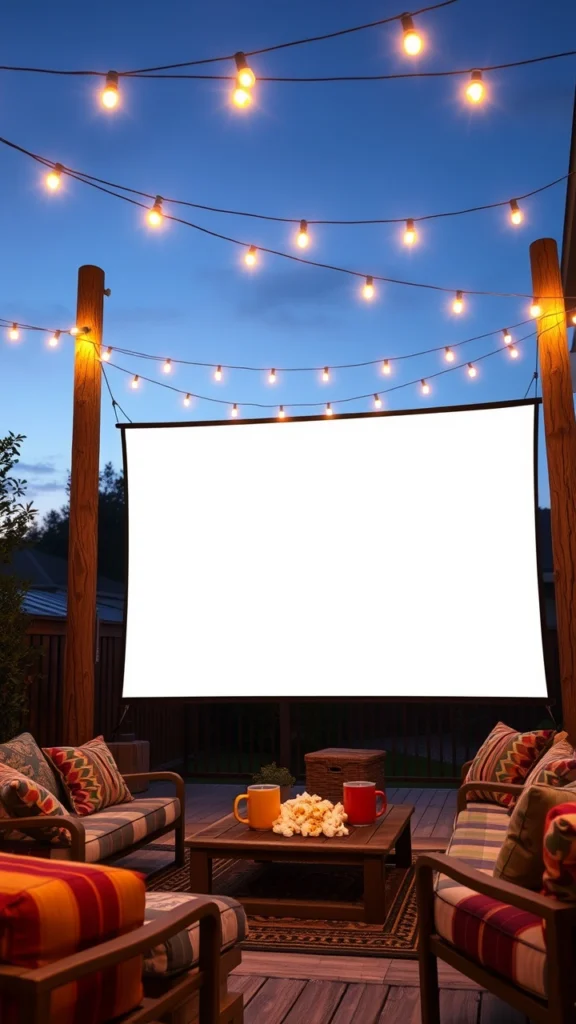
An outdoor movie screen is a fantastic way to bring a fun, unexpected twist to your backyard gatherings. Movie nights under the stars are a hit with friends and family, offering a laid-back yet exciting way to spend time together. The best part? Setting up an outdoor movie screen doesn’t require much space or a hefty budget—just a bit of creativity and some basic materials. Imagine watching your favorite films or sporting events while enjoying the fresh air, with the glow of the screen and the laughter of your loved ones filling the night.
To create your own outdoor movie experience, you can either hang a simple white sheet or invest in an affordable portable projector screen, which usually costs around $30 to $60. The sheet works just as well if you don’t want to spend much—just make sure it’s large and wrinkle-free for the best viewing quality. You can hang the sheet on a wall, fence, or between two trees using hooks or a rope. If you choose a portable screen, set it up according to the manufacturer’s instructions.
For the movie itself, you’ll need a projector, which typically costs between $70 and $150, depending on the quality and features. You can often find budget-friendly options that still offer good brightness and image quality for outdoor use. Pair the projector with a Bluetooth speaker or portable sound system (around $20 to $50) for clear, immersive sound. Ensure your viewing area is free from light pollution, so the image on the screen remains crisp and clear.
Setting up an outdoor movie night requires minimal effort but yields a big payoff in terms of fun. It’s a perfect way to add an element of surprise to a regular evening hangout. Whether you’re hosting a casual family night or a fun gathering with friends, this simple setup creates a memorable experience that everyone will enjoy.
12. Seasonal Decor Accents
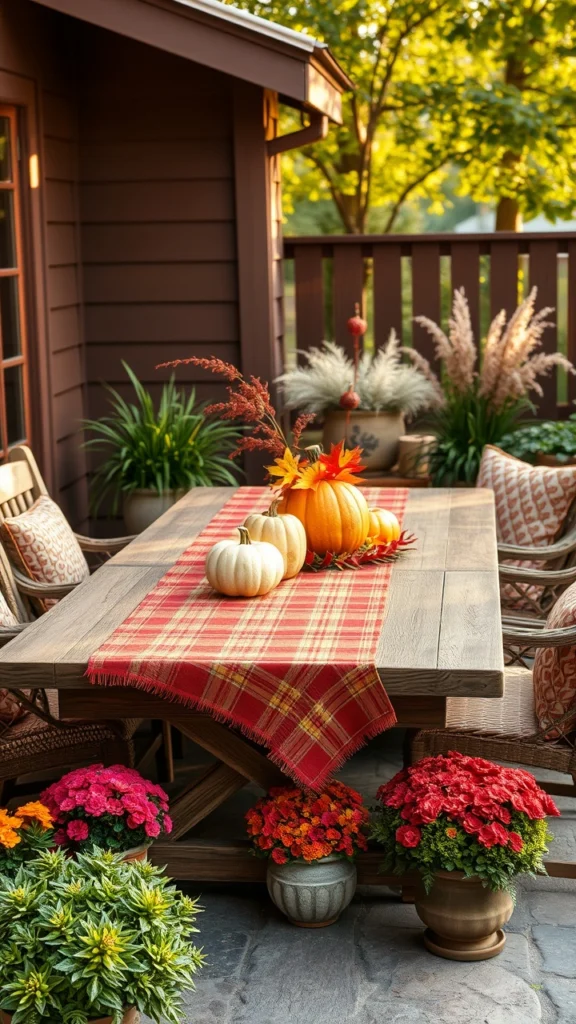
Seasonal decor accents are a simple yet effective way to keep your patio feeling fresh, festive, and in tune with the changing seasons. By incorporating seasonal items like pumpkins, lanterns, or fairy lights, you can effortlessly transform your outdoor space to match the time of year. Whether it’s the warm glow of autumn pumpkins, the twinkle of winter fairy lights, or vibrant spring flowers, seasonal decorations add personality and charm to your patio. Plus, they create a welcoming atmosphere for any gathering, from casual family dinners to holiday celebrations.
To keep things easy and affordable, look for decorations that can be swapped out as the seasons change. For example, in fall, you can use small pumpkins, hay bales, and autumn-colored leaves, while in winter, you might hang lanterns, garlands, or string up fairy lights to add a cozy vibe. As spring rolls around, fresh flowers, pastel-colored candles, and light fabrics can give your space a lighter, brighter feel. Summer might call for outdoor cushions, colorful lanterns, or even a flag or banner to add a festive touch.
The great thing about seasonal decor is that you can often find items for a low cost, especially at thrift stores or during seasonal sales. Small hooks can help you hang items like lights or garlands, while decorative items like lanterns or small plants can be placed strategically around the patio. Storing your decorations in a small bin between seasons keeps them organized and ensures they stay in good condition for future use.
Changing your decorations with the seasons keeps your patio feeling fresh and exciting year-round. It’s an easy way to show off your personal style while staying in tune with nature’s rhythm. Whether you’re hosting a special event or just enjoying a quiet evening outdoors, seasonal accents help set the tone and make your space feel even more inviting.
13. Hammock Corner
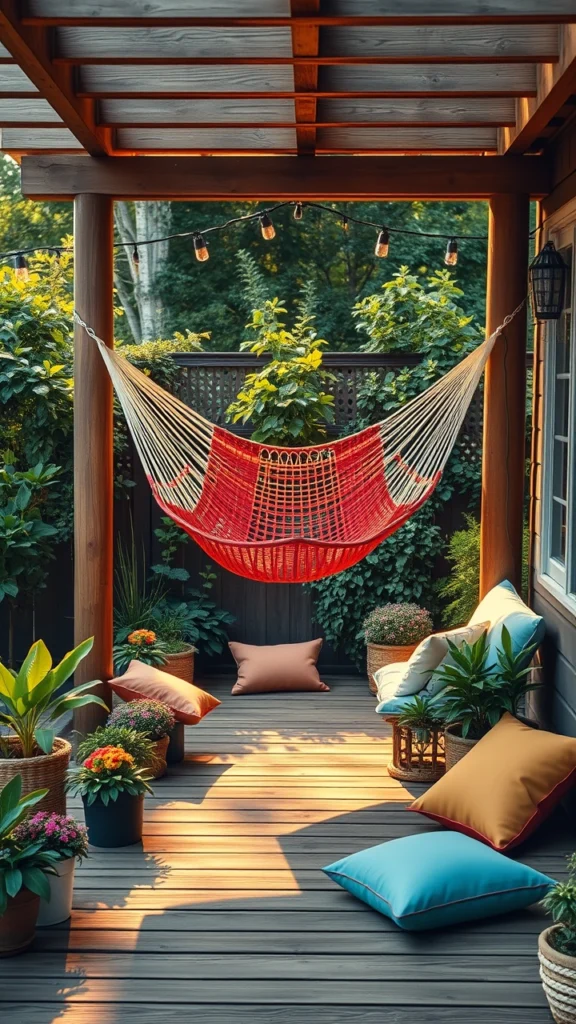
A hammock corner is a fantastic way to add a relaxing, chill-out spot to your patio. Imagine lying back in a hammock, swaying gently in the breeze with a good book or simply enjoying the outdoors. It brings an instant sense of calm and is perfect for unwinding after a busy day or for a leisurely afternoon with friends and family. Plus, a hammock doesn’t take up much space, so it’s a great option even if you have a smaller patio or backyard.
Setting up a hammock is easy and affordable. If you have trees or sturdy posts in your yard, you can attach the hammock using straps or ropes, which are often included when you buy the hammock. Straps typically cost around $10 to $20, and the hammock itself can range from $30 to $70, depending on the style and material. If you don’t have trees or posts to work with, a hammock stand is a great alternative. A simple stand can be found for $40 to $100, and it allows you to place the hammock anywhere, even on a patio or balcony.
Once the hammock is set up, all that’s left to do is relax. You can enhance the hammock corner with pillows, throws, or a small table for drinks to create a cozy, inviting atmosphere. Whether you’re using the hammock to nap, read, or just take in the surroundings, it’s the perfect addition to any outdoor space. It adds not only a functional spot for relaxation but also a fun and unique element to your backyard. A hammock corner is a simple way to make your patio feel like a true escape.
14. Rustic Table Centerpieces
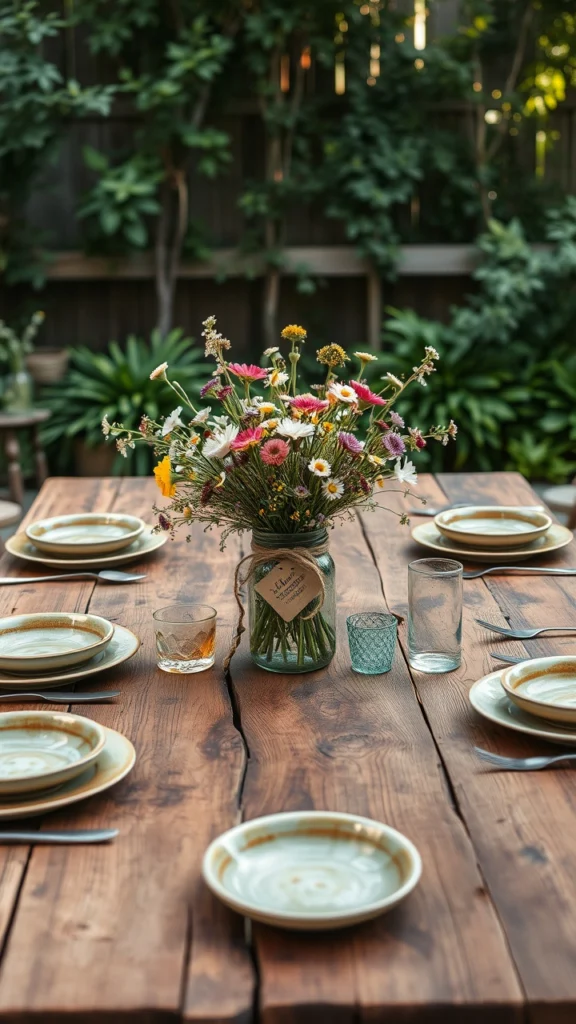
Rustic table centerpieces are a charming and budget-friendly way to add style to your outdoor gatherings. They bring a natural, earthy touch to your patio without overwhelming the space with excessive decor. Simple items like mason jars, candles, stones, or fresh flowers can easily transform an ordinary table into a beautiful focal point. Whether you’re hosting a casual BBQ or a cozy dinner party, a rustic centerpiece creates a warm, inviting atmosphere for your guests.
To create a rustic centerpiece, start with basic materials you likely already have around the house. Mason jars are perfect for holding flowers, candles, or even small twigs. They can be arranged as a single jar or grouped together for a more substantial look. You can wrap the jars with twine, burlap, or ribbon for added texture, giving them a rustic, country feel. In addition to jars, you can incorporate other natural elements like stones, pinecones, or small logs. Seasonal foliage, like autumn leaves or spring blooms, can also add a fresh and organic touch.
Setting up these centerpieces is simple. Place the jars or other items in the center of your table and arrange them in an appealing way—perhaps a cluster of varying heights for visual interest. You can add candles inside the jars for a cozy glow, or scatter small stones or petals around the base for a more natural look. Seasonal accents such as pumpkins in fall or fresh greenery in spring can keep the centerpiece relevant and fresh throughout the year.
Rustic table centerpieces provide a simple yet stylish way to decorate your patio. They bring a natural element to your outdoor space without the need for expensive or complicated decorations. Plus, they can be easily swapped out depending on the season, ensuring your patio always feels updated and inviting.
15. DIY Firewood Rack
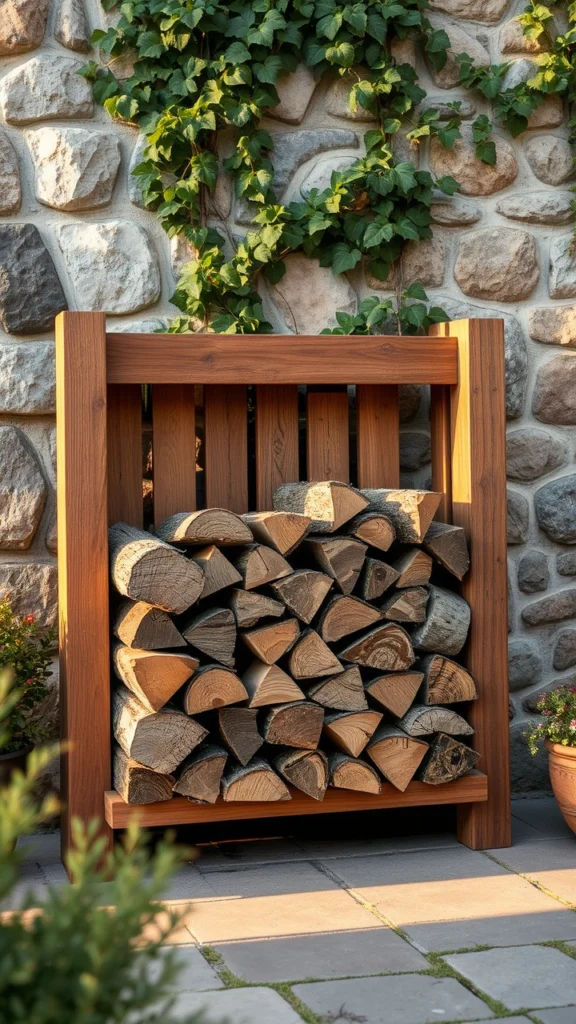
A DIY firewood rack is a practical and stylish addition to your outdoor space, especially if you enjoy cozy fire pit evenings. It helps keep your firewood neatly organized and protected from the elements, ensuring that it’s dry and ready to burn when needed. Not only does this keep your patio tidy, but it also adds a rustic, charming touch to your backyard. Having a designated space for firewood prevents it from piling up in unsightly heaps, keeping your outdoor area neat and welcoming.
Building a simple firewood rack is straightforward and can be done with just a few basic materials. Start with 2x4s, which are inexpensive and easy to work with. You’ll need four pieces for the sides and a few additional pieces to create the base and cross supports. Use a saw to cut the wood to your desired dimensions, and then screw the pieces together with a drill to form a sturdy frame. The rack should be raised slightly off the ground, which will help keep the wood dry and prevent it from sitting in any standing water. You can customize the design depending on how much firewood you plan to store and the size of your space.
In terms of cost, the materials for this project can be found for around $20–$40, depending on the size of the rack and the quality of the wood. This makes it an affordable and highly functional DIY project. If you prefer a more polished look, you can stain or paint the wood to match your patio decor, but even untreated wood gives the rack a natural, rustic appeal that fits well with most outdoor settings.
Overall, a DIY firewood rack is a simple yet effective way to organize your outdoor firewood while adding an extra layer of functionality and style to your patio. It’s a perfect project for those looking to keep things neat and make their outdoor space even more inviting.
16. Vertical Garden Wall
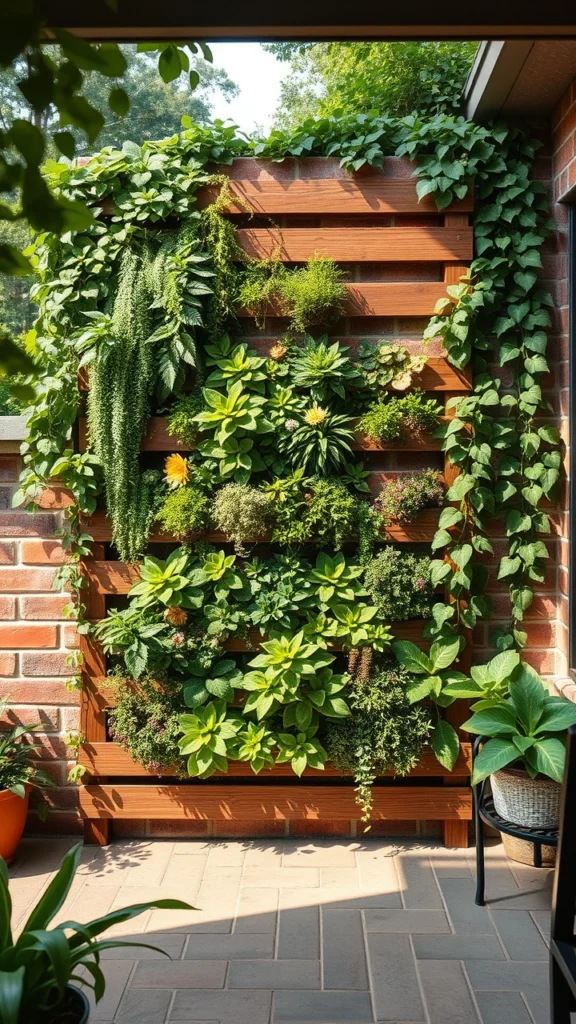
A vertical garden wall is an excellent solution for those who want to add greenery to their patio without sacrificing valuable floor space. It’s especially useful for small patios where space is limited, allowing you to enjoy the benefits of gardening while maintaining a clean, uncluttered look. This type of setup not only enhances your outdoor space with vibrant plants but also creates a unique, visually appealing feature that makes your patio feel more like a private oasis.
To build a vertical garden wall, start by constructing a simple wooden frame or lattice structure. You can easily find lattice panels or use wooden planks to create a grid-like design. This frame will serve as the base for hanging pots, which can be attached using hooks or other sturdy hangers. The key to making this setup work is to ensure the frame is secured well to the wall or fence to handle the weight of the pots and plants. You can hang several rows of pots or even stagger them for a more dynamic look.
Materials for this project are fairly inexpensive. A basic wooden frame or lattice typically costs around $15 to $30, while small plant pots are available for about $1 to $5 each, depending on the size and material. For plants, choose varieties that thrive in containers and can handle different levels of sunlight, such as herbs, flowers, or succulents. The setup is customizable, allowing you to arrange the pots in a way that suits your personal style and space.
A vertical garden wall not only saves floor space but also adds a touch of nature and tranquility to your patio. It’s a great way to display your love for plants and enhance the overall aesthetic of your outdoor area, all while keeping your space organized and functional.
17. Outdoor Games Setup
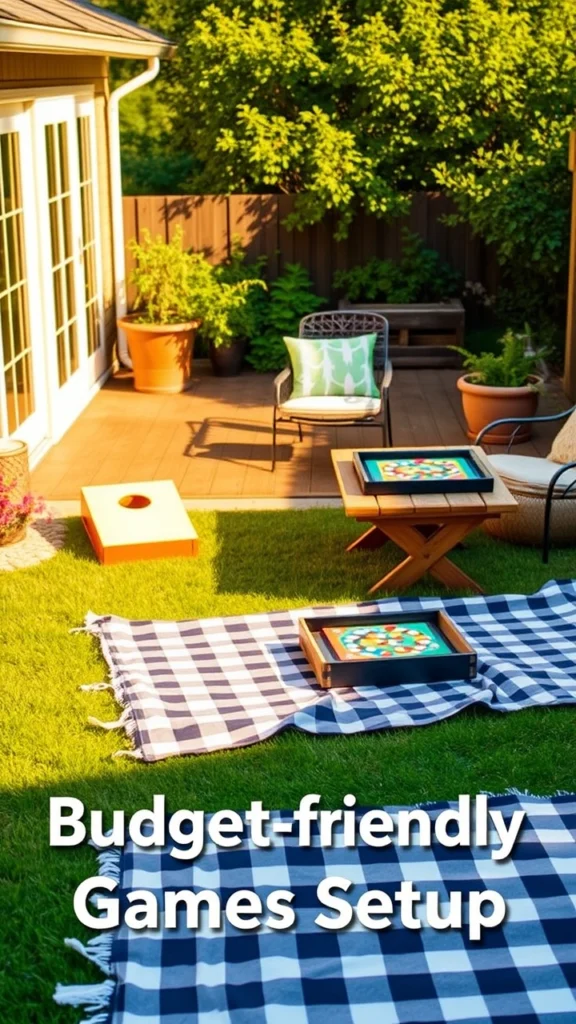
An outdoor games setup is a fantastic way to keep guests entertained during casual gatherings on your patio. Games like cornhole, ring toss, or giant Jenga offer simple fun for people of all ages, making your backyard the perfect spot for laughter and friendly competition. Not only do they provide entertainment, but they also encourage social interaction, which is ideal for parties or family get-togethers. Best of all, setting up an outdoor games area is affordable and easy to do with minimal space and effort.
To get started, you can either purchase pre-made game kits or build your own using affordable materials. For example, cornhole sets can be bought for around $40 to $80, while a DIY version can be made using plywood and bean bags for about $20 to $30. Ring toss can be created with simple materials like bottles and a rope for the rings, costing under $15 if you opt to make it yourself. Giant Jenga sets, which are typically sold for $30 to $50, can be made with large wooden blocks for a fraction of the price.
Once you have your games, place them in a corner of your patio or garden. Ensure there’s enough space for guests to move around and enjoy the game without feeling cramped. You can also add seating or small tables nearby where people can take a break or enjoy snacks in between turns. These games are a hit because they are easy to set up and don’t require any special skills to play, making them great for all types of gatherings.
By adding an outdoor games setup to your patio, you create an atmosphere of fun and relaxation for your guests without breaking the bank. It’s a simple way to elevate the experience of any casual gathering while encouraging everyone to participate and enjoy the outdoors.
18. DIY Beverage Station
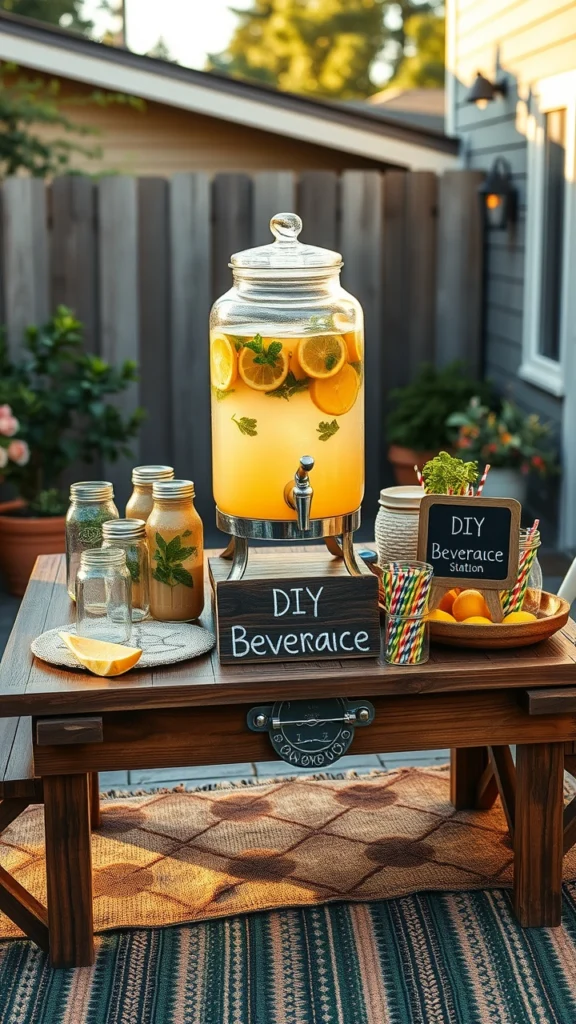
A DIY beverage station is a clever and practical way to keep drinks organized and easily accessible during your patio gatherings. Repurposing an old dresser or table into a dedicated drink station not only adds a touch of personality to your space but also ensures that your guests have everything they need in one convenient spot. Whether it’s a casual BBQ or an evening with friends, having a designated area for drinks helps keep the party flowing smoothly and makes the hosting experience more enjoyable.
To create your own beverage station, start by finding an old dresser, table, or even a bar cart that you no longer need. You can paint or refinish the piece to give it a fresh look that matches your patio decor. Once your station is ready, use the drawers to hold ice and chill cans or bottles, or set up a few buckets on top for a more open display of drinks. Adding a bottle opener to the side of the dresser or table ensures that guests have easy access to it when needed, while cups and glasses can be stored in the other drawers or on a nearby shelf.
The materials for this project are relatively inexpensive. You can pick up a used dresser or table at a thrift store for as little as $20–$50, while buckets for chilling drinks cost around $5 to $15 each. A bottle opener will run you about $5 to $10, and plastic or reusable cups can be bought for under $10. If you’re feeling extra creative, you can add a chalkboard or label to the station to mark different drink options, which helps keep things organized and adds a fun touch.
A DIY beverage station is an affordable yet stylish solution for keeping drinks cold and organized during your outdoor events. It’s a functional way to make your patio gatherings feel even more special while offering guests easy access to refreshing beverages. Plus, it gives new life to old furniture, making it a sustainable and unique addition to your backyard setup.
19. Shade Sail Installation
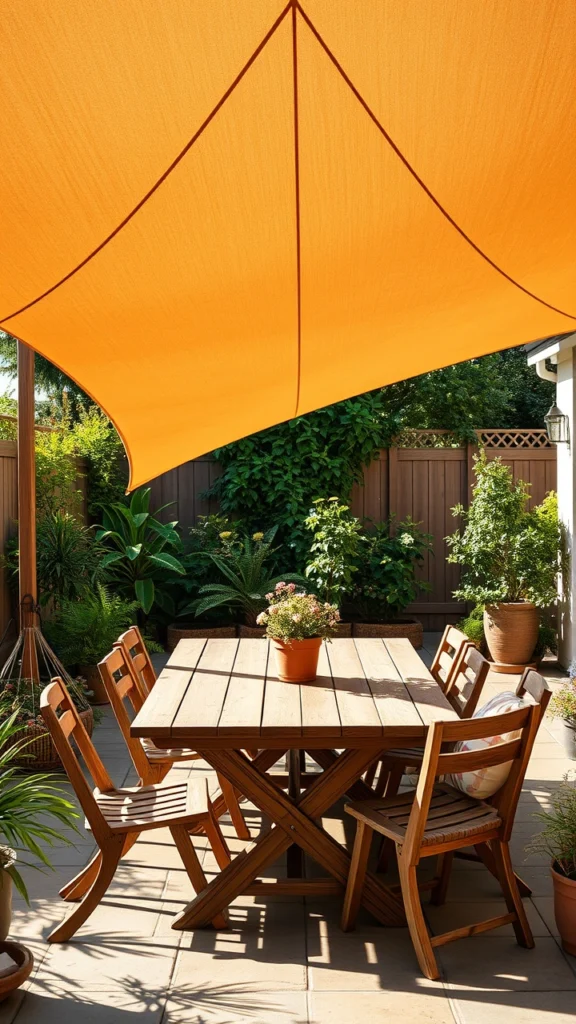
Shade sails are a stylish and modern way to add much-needed shade to your patio, providing both comfort and visual appeal. These fabric sails not only protect your guests from the sun but also enhance the aesthetic of your outdoor space with their sleek, contemporary design. Whether you’re hosting a barbecue or enjoying a quiet afternoon, a shade sail offers a functional and eye-catching solution to keeping your patio cool and comfortable.
To install a shade sail, start by choosing a fabric that is UV resistant, which will ensure it withstands the elements and provides adequate protection from the sun. Shade sails come in a variety of sizes, shapes, and colors, allowing you to customize the look of your outdoor space. Next, secure the sail to existing walls or sturdy poles using eye hooks and rope. Depending on your setup, you may need to drill small holes into the walls or poles to attach the hooks. After attaching the hooks, stretch the sail taut and tie it securely to prevent sagging.
The materials for this project are reasonably priced, with a shade sail costing around $30 to $100 depending on size and quality. Eye hooks and rope are affordable, usually totaling around $10 to $20. If you need poles to support the sail, you can find sturdy options for about $15 to $30 each. Installation is fairly simple and can typically be completed in an afternoon with basic tools like a drill, measuring tape, and a ladder for reaching higher areas.
A shade sail installation provides both practical and aesthetic benefits for your patio. It offers relief from the sun’s heat while adding a modern, stylish touch to your outdoor space. With minimal investment and effort, this project transforms your patio into a cooler, more comfortable area perfect for relaxation and social gatherings.
Conclusion
Transforming your patio into a welcoming and functional outdoor space doesn’t require a hefty budget. With a little creativity and a few smart upgrades, your patio can become a cozy gathering spot for friends and family. Whether it’s through adding soft lighting, building a simple DIY picnic table, or setting up a vertical garden, these small changes can make a big difference in the overall vibe of your outdoor area. The beauty of these budget-friendly ideas lies in their ability to create a space that feels personal and inviting without breaking the bank.
The best part? As you implement these ideas, you’ll quickly realize that it’s not about spending more money—it’s about making the most of what you already have. By using affordable materials, repurposing old items, and focusing on the essentials, you’ll build a space that’s perfect for enjoying meals, laughter, and meaningful conversations. Remember, your patio doesn’t need to be perfect or expensive to create lasting memories. It’s all about enjoying time with the people who matter most in a space that feels like home. So, why wait? Start with one or two simple upgrades, and let your patio become the go-to spot for fun and relaxation!